Webtrix24 CRM allows users to create, assign, track, and manage tasks from a centralized Task Management module.
The Task module helps teams organize daily activities, track progress, manage follow-ups, and improve collaboration across departments.
Who Can Use the Task Module?
The Task Module is designed for individuals and teams who need to plan, assign, track, and manage daily activities.
The module can be used by:
- Sales Teams for managing lead follow-ups and customer interactions.
- Customer Support Teams for tracking service requests and issue resolution activities.
- Marketing Teams for managing campaigns, content reviews, and promotional activities.
- Project Teams for tracking project-related tasks and milestones.
- Operations Teams for managing internal processes and daily work activities.
- Managers and Team Leaders for assigning tasks, monitoring progress, and reviewing team performance.
The Task Module helps teams improve collaboration, track responsibilities, and ensure that important activities are completed on time.
Common Uses of the Task Module
Examples of activities that can be managed using the Task Module:
- Lead Follow-Ups
- Customer Meetings
- Sales Activities
- Campaign Execution
- Website Updates
- Content Reviews
- Project Tasks
- Internal Team Activities
- Customer Support Activities
- Approval and Review Processes
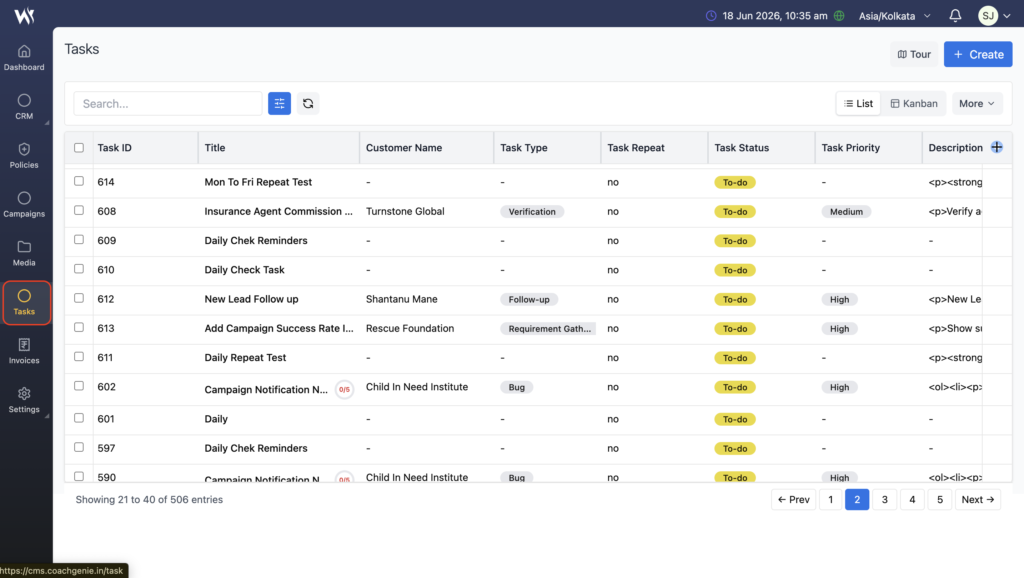
Accessing Task
Steps:
- Click Tasks from the left navigation panel.
- The Tasks List View page will open displaying all available Tasks records.
Creating a Task
To create a new task:
- Open the Tasks module.
- Click Create.
- Enter the required task information.
- Click Save or Save & New.
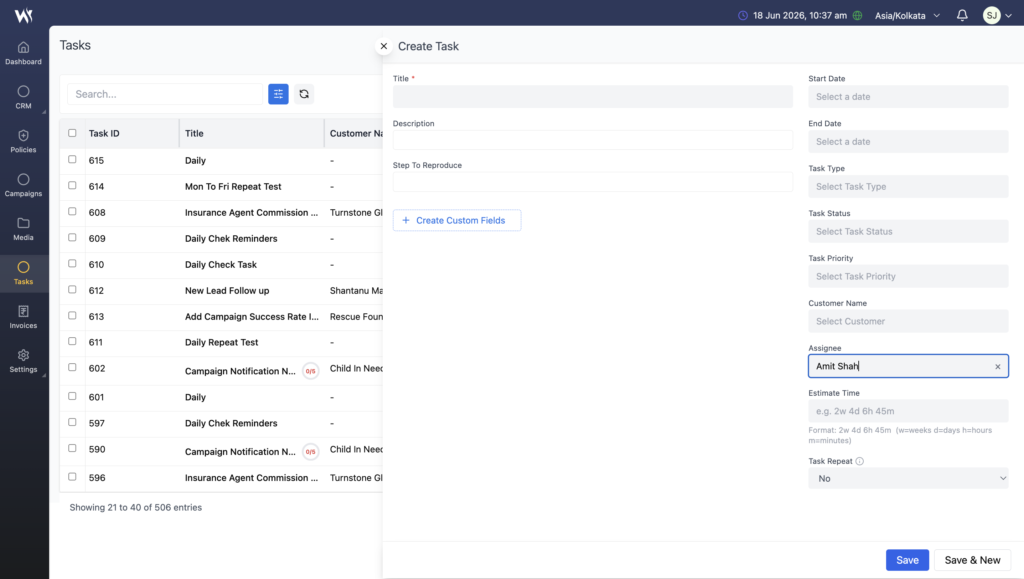
Task Information
Users can configure the following task details:
- Task Title
- Description
- Start Date
- End Date
- Task Type
- Task Type
- Task Status
- Task Priority
- Customer
- Assignee
- Estimated Time
The task becomes available in the task list after it is saved.
Task Repeat Options
Webtrix24 CRM supports recurring tasks for activities that need to be performed regularly.
Available repeat options include:
- No Repeat
- Daily
- Monday to Friday
- Weekend
- Custom Repeat
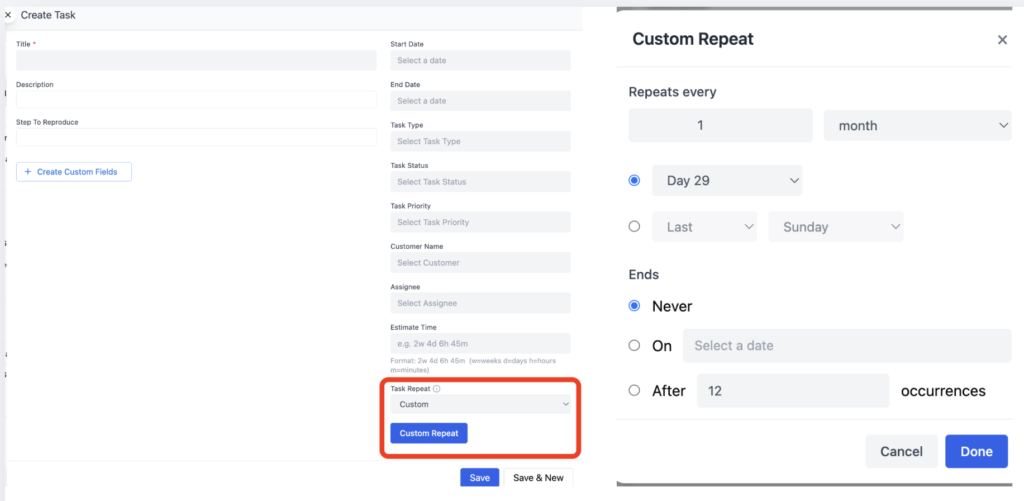
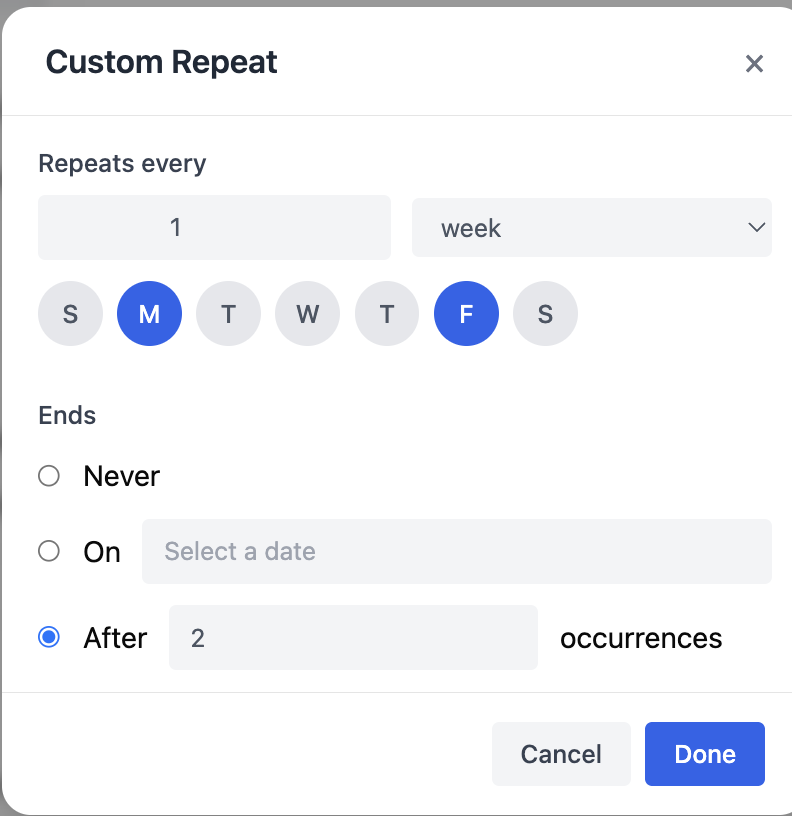
Custom Repeat
Custom Repeat allows users to create recurring tasks using flexible scheduling rules. Users can define how often a task should repeat and when the recurrence should stop.
Users can configure:
- Repeat frequency
- Day, week, or month intervals
- End date
- Number of occurrences
This helps automate recurring activities and reminders.
Opening Custom Repeat
- Click Create Task.
- Fill in the required task details.
- Click the Task Repeat field.
- Select Custom from the Repeat dropdown.
- Enable the Custom Repeat option.
- The Custom Repeat popup will open.
- Configure the repeat settings:
- Repeats Every (e.g., 1 Month)
- Day / Week Selection
- Ends (Never / On Date / After Occurrences)
- Click Save in the Custom Repeat popup.
- Click Save to create the task with the configured Custom Repeat settings.
Repeats Every
Users can define the recurrence interval by entering a number and selecting a frequency type.
Day
Repeats the task after the specified number of days.
Example:
- Repeats Every: 1 Day → Task repeats daily.
- Repeats Every: 3 Days → Task repeats every third day.
Week
Repeats the task after the specified number of weeks.
Users can select one or multiple weekdays.
Example:
- Every 1 Week on Monday → Task repeats every Monday.
- Every 2 Weeks on Monday and Friday → Task repeats every second week on Monday and Friday.
Month
Repeats the task every specified number of months.
Users can choose one of two methods:
Option 1 – Specific Day of Month
The task repeats on a selected day number.
Example:
- Day 15 → Task repeats on the 15th of every month.
- Day 29 → Task repeats on the 29th of every month.
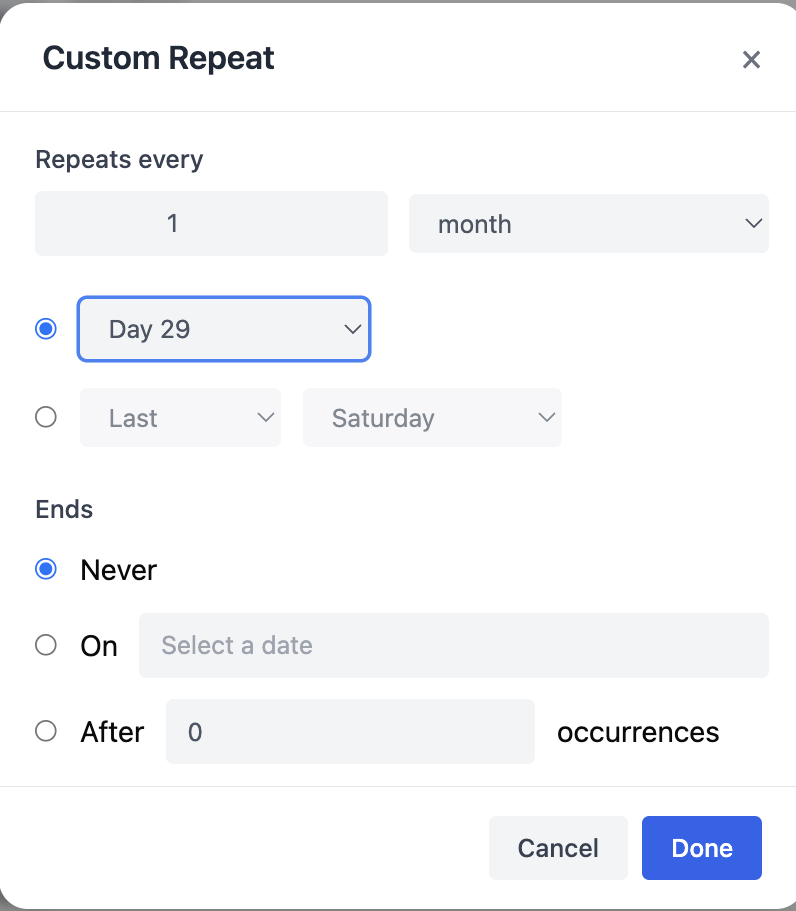
Option 2 – Week Position and Weekday
The task repeats based on a week position and weekday combination.
Available Week Positions:
- First
- Second
- Third
- Fourth
- Last
Available Weekdays:
- Sunday
- Monday
- Tuesday
- Wednesday
- Thursday
- Friday
- Saturday
Examples:
- First Monday of every month
- Third Friday of every month
- Last Saturday of every month

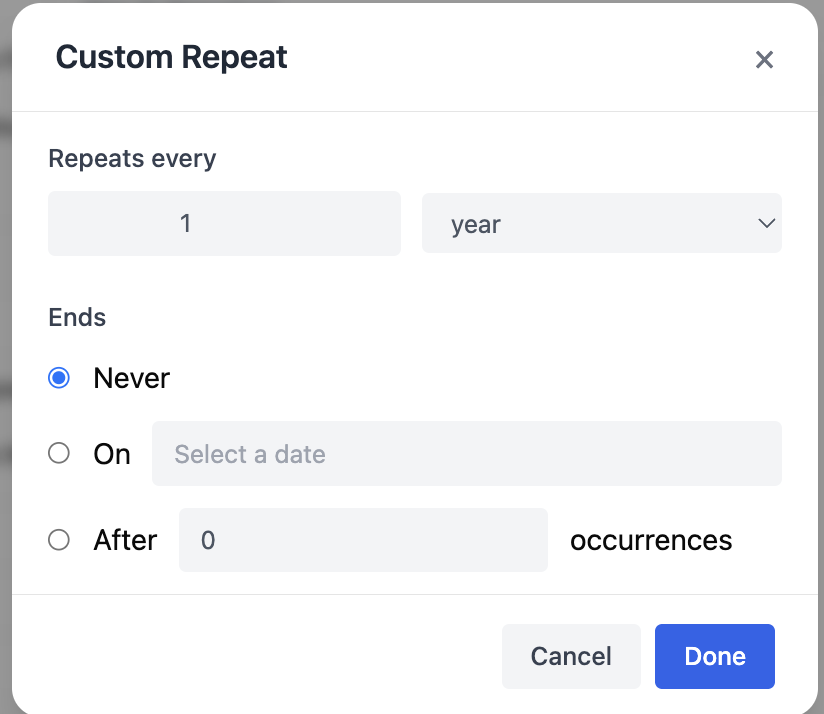
Year
Repeats the task every specified number of years.
Example:
- Every 1 Year → Task repeats once every year.
- Every 2 Years → Task repeats once every two years.
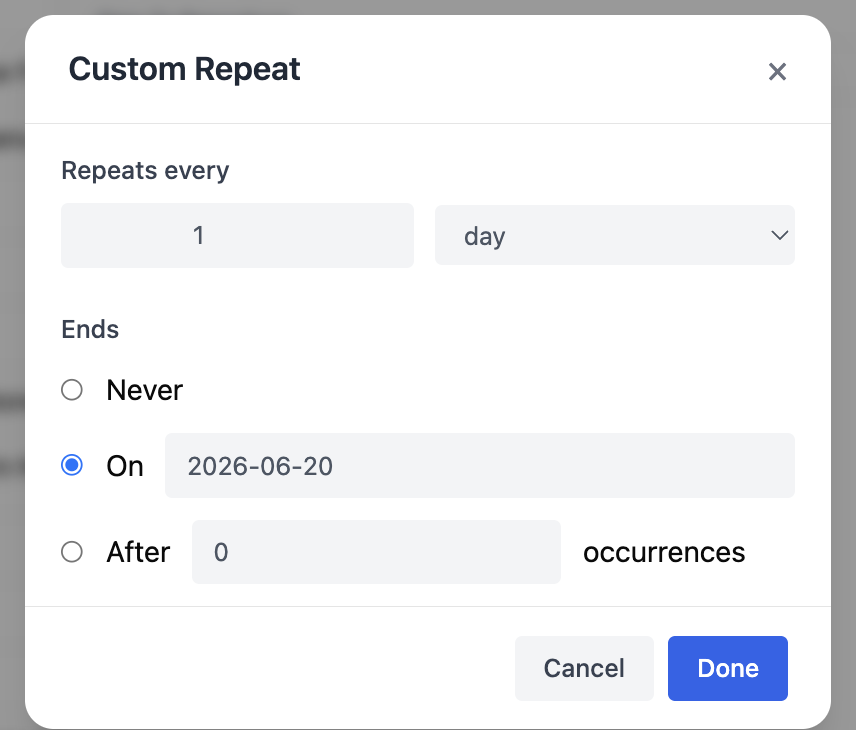
Ends Options
Users can define when the recurring task should stop.
The task continues repeating indefinitely.
Never

On
The task stops repeating on a selected date.
Example:
- End Date: 31 December 2026
After this date, no additional recurring tasks will be generated.

After
The task stops after a specified number of occurrences.
Example:
- After 12 Occurrences
The system creates the task 12 times and then automatically stops future repetitions.

Notes
- Multiple weekdays can be selected for weekly recurrence.
- Monthly recurrence supports both date-based and weekday-based scheduling.
- Recurring tasks are automatically generated according to the configured schedule.
- End conditions help control how long the recurrence remains active.
Managing Tasks
After a task is created, users can:
- View task details
- Update task information
- Change task status
- Modify task priority
- Reassign tasks
- Track task progress
Task records can be managed directly from the List View.
Task Details
When an existing task is opened, additional task management options become available.
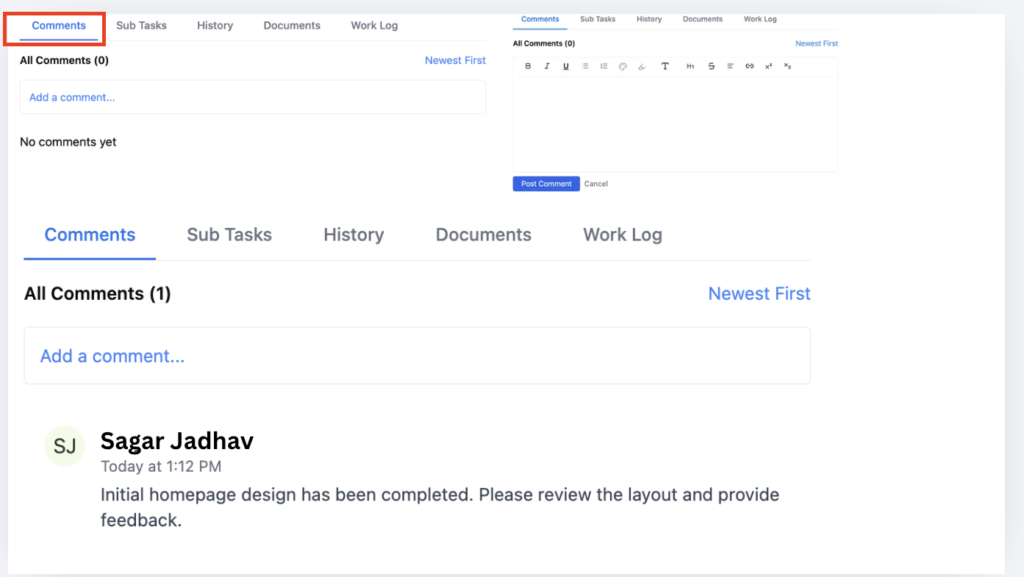
Comments
The Comments section allows users to add discussions, updates, notes, and task-related communication directly within a task.
Comments help team members collaborate, share progress updates, provide feedback, and maintain a complete activity history without relying on external communication channels.
Why Use Comments?
Comments help users:
- Share task-related updates.
- Communicate with team members.
- Record important notes and decisions.
- Provide status updates during task execution.
- Maintain a centralized discussion history.
Adding Comments
While editing a task, users can add one or more comments Under the Task form.
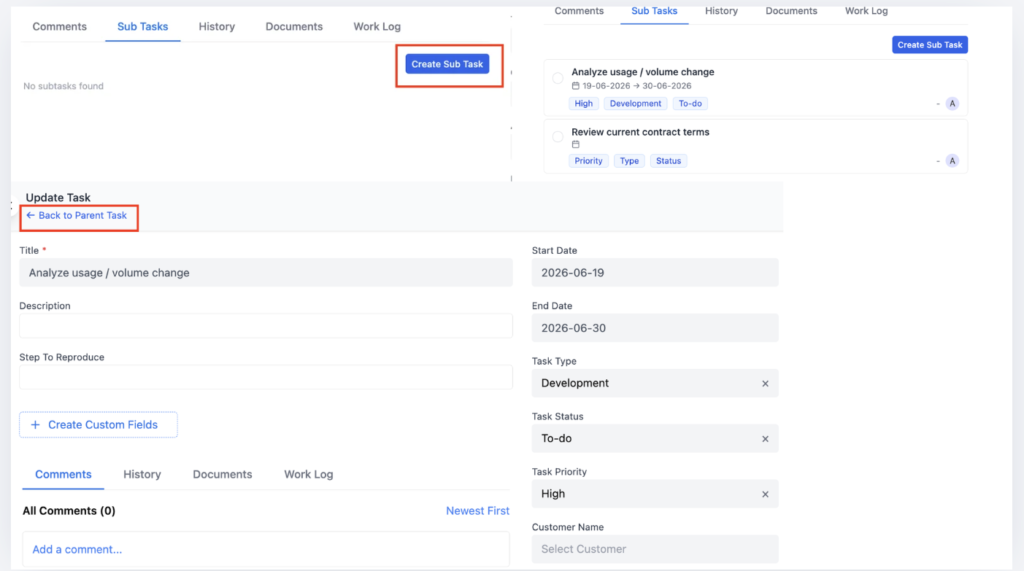
Sub Tasks
Sub Tasks help break a large task into smaller actionable activities. This makes task management easier, improves accountability, and provides better visibility into overall progress.
Users can create multiple Sub Tasks under a parent task and assign each Sub Task to the appropriate team member.
Why Use Sub Tasks?
Sub Tasks help users:
- Divide large tasks into manageable activities.
- Assign responsibilities to different team members.
- Track progress at a detailed level.
- Improve collaboration and accountability.
- Monitor overall completion status from a single task.
Creating Sub Tasks
While editing a task, users can add one or more Sub Tasks under the parent task.
Each Sub Task represents a specific activity that contributes to the completion of the main task.
Example
Parent Task:
- Product Launch Campaign
Sub Tasks:
- Design Email Template
- Create Audience List
- Review Content
- Schedule Campaign
- Launch Campaign
Assigning Sub Tasks
Each Sub Task can be assigned to a different team member.
This helps distribute work among multiple users while keeping everything organized under a single parent task.
Example
| Sub Task | Assignee |
|---|---|
| Design Email Template | Rahul |
| Create Audience List | Priya |
| Review Content | Amit |
| Schedule Campaign | Admin |
| Launch Campaign | Manager |
Using separate assignees ensures that each activity has a clear owner and responsibility.
Managing Sub Tasks
Users can:
- Create multiple Sub Tasks.
- Assign Sub Tasks to different users.
- Edit existing Sub Tasks.
- Mark Sub Tasks as completed.
- Track pending and completed activities.
- Monitor overall task progress.
Progress Tracking
The system automatically calculates task progress based on completed Sub Tasks.
Example 1
Total Sub Tasks: 5
Completed Sub Tasks: 1
Progress:
1/5
Example 1
Total Sub Tasks: 5
Completed Sub Tasks: 3
Progress:
3/5
Task List View Progress Indicator
When a task contains Sub Tasks, the Task List View displays a progress indicator showing completed Sub Tasks versus total Sub Tasks.
| Completed | Progress Display |
|---|---|
| 0 of 5 | 0/5 |
| 1 of 5 | 1/5 |
| 3 of 5 | 3/5 |
| 5 of 5 | 5/5 |
This allows users to quickly understand task completion without opening the task details page.
Benefits of Sub Tasks
- Better task organization.
- Improved work breakdown.
- Easier progress monitoring.
- Increased team productivity.
- Better visibility into task completion.
- Simplified tracking of large projects.
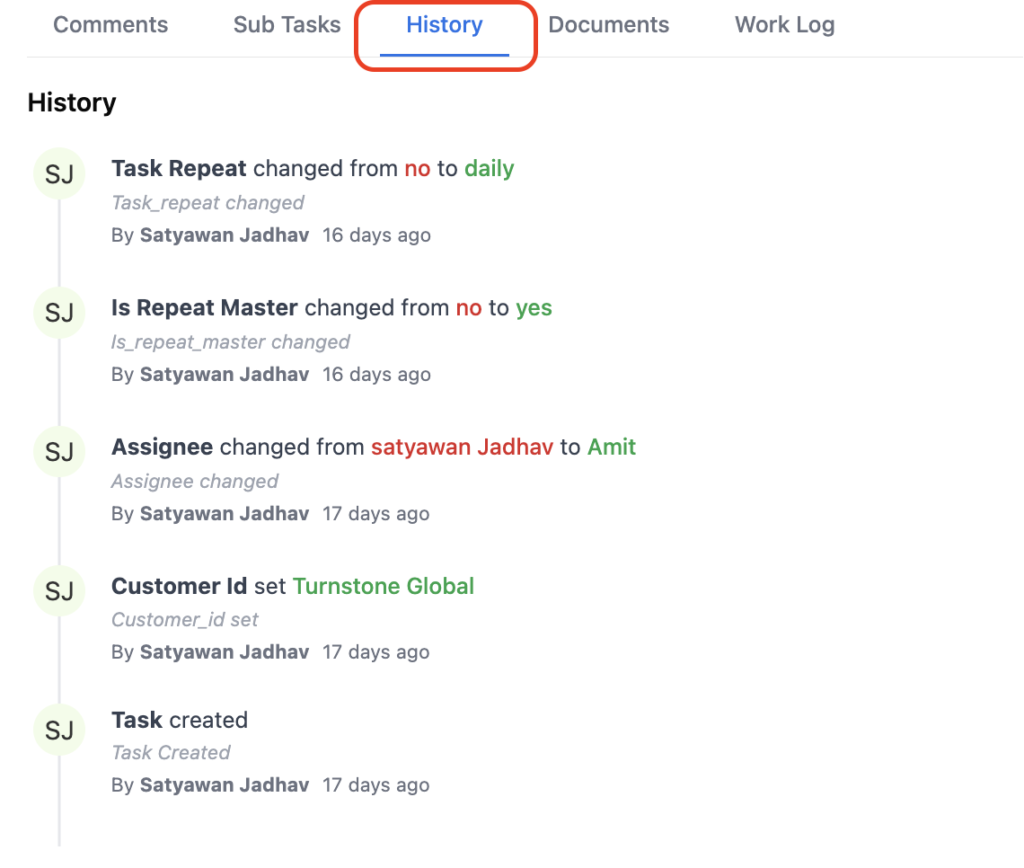
History
The History section records important task activities such as:
- Task creation
- Status changes
- Field updates
- Assignment changes
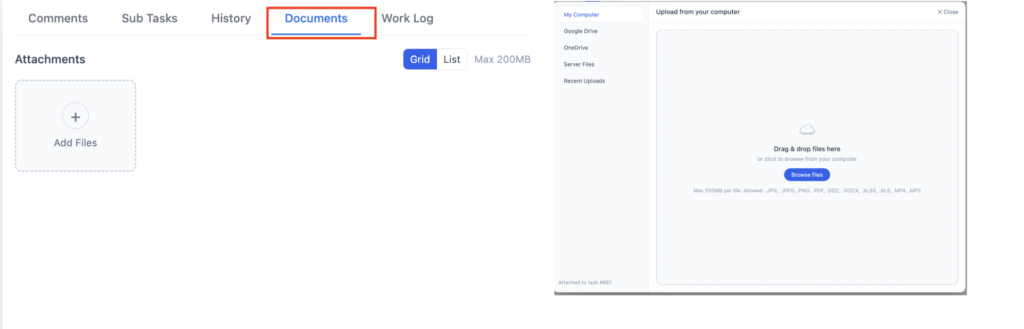
Documents
Users can upload and manage documents related to the task.
Examples:
- Requirement documents
- Screenshots
- Reports
- Reference files
Work Log
The Work Log section helps users track the time spent on task-related activities.
This improves productivity tracking and project visibility.

Task Status
Task Status helps users monitor the current stage of work.
Examples may include:
- To-do
- In Progress
- Completed
- On Hold
Available statuses may vary based on system configuration.
Task Priority
Priority helps users identify the importance of a task.
Examples:
- High
- Medium
- Low
Priority levels help teams focus on critical activities first.
Task Assignment
When creating a task, users can assign the task to one or more team members using the Assignee field.
The assigned user becomes responsible for completing and updating the task.
This helps teams distribute work efficiently and maintain accountability.
Task Time Estimation
The Estimate Time field helps users define the expected effort required to complete a task.
Example:
- 2h
- 5h
- 1d 4h
- 2w 3d
Estimated time helps teams plan workloads and monitor task completion timelines.
Task Notifications
When a task is assigned to a user, Webtrix24 CRM automatically sends notifications to keep team members informed.
Users may receive:
- In-app notifications within Webtrix24 CRM
- Email notifications for newly assigned tasks
- Updates when task details are modified
- Notifications for task status changes and important activities
These notifications help users stay updated on assigned responsibilities and ensure timely task completion.
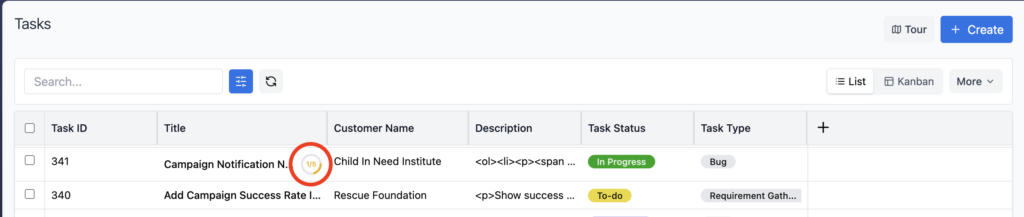
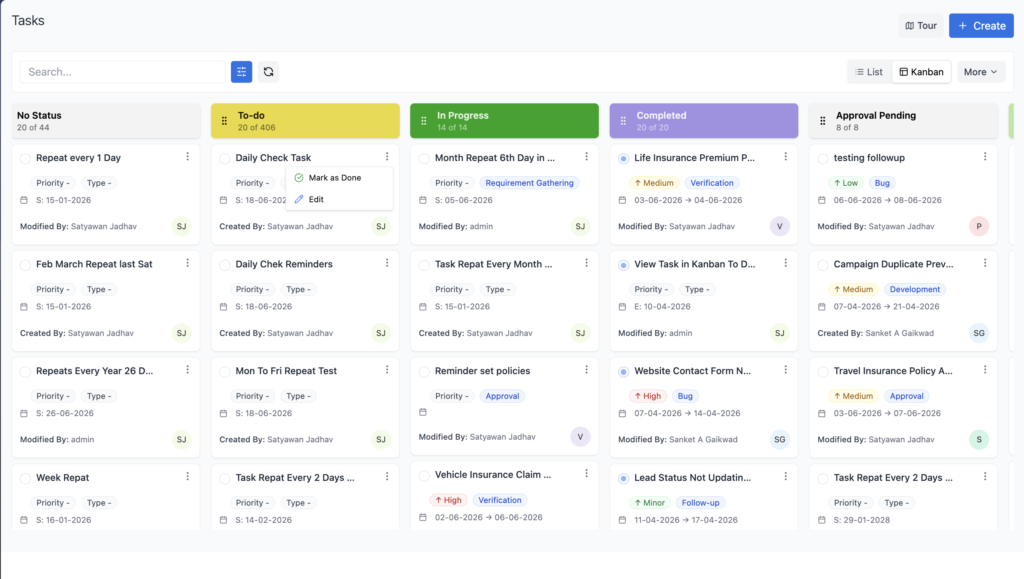
Task Views
The Tasks module supports multiple view options for managing tasks efficiently.
List View
Displays tasks in a tabular format with task details such as title, assignee, status, priority, and dates.
Kanban View
Displays tasks grouped by their current status, helping users track progress visually and manage work more effectively.
Users can switch between List View and Kanban View based on their preferred workflow.
Frequently Asked Questions
Can I create recurring tasks in Webtrix24 CRM?
Yes. Users can create recurring tasks using Daily, Weekday, Weekend, and Custom Repeat options.
Can tasks be assigned to other users?
Yes. Tasks can be assigned to users using the Assignee field.
What is the purpose of Sub Tasks?
Sub Tasks help divide large tasks into smaller and manageable activities.
Can I track sub task progress?
Yes. The Task List View displays sub task completion progress. For example, if 1 out of 5 sub tasks are completed, the system shows 1/5 progress for the task.
Can I upload documents to a task?
Yes. Documents can be attached and managed from the Documents section of the task.
Can I track task updates?
Yes. The History section records important task-related activities and updates.
Will users receive notifications when a task is assigned?
Yes. When a task is assigned to a user, the system can send in-app notifications and email notifications, helping users stay informed about new assignments and task updates.
Can I view tasks in different formats?
Yes. The Tasks module supports both List View and Kanban View, allowing users to manage tasks based on their preferred workflow.