Release Date: 25 June 2026
Release Overview
Version 1.0.0 introduces two new modules to the Webtrix24 Rental Application:
- Lead Module
- Task Module
These modules help businesses manage customer inquiries, assign follow-up tasks, improve team collaboration, and streamline daily rental operations.
What’s New
This release includes:
New Modules
- Lead Module
- Task Module
New Features
- Lead Management
- Task Management
- Lead to Customer Conversion
- Email Integration
- Task Repeat
- Custom Repeat
- Sub Tasks
- Work Log
- Kanban View
- Export PDF & Excel
- Notifications
- Activity History
- Document Management
Module Configuration
Before using the new modules, they must be added to your Rental Application.
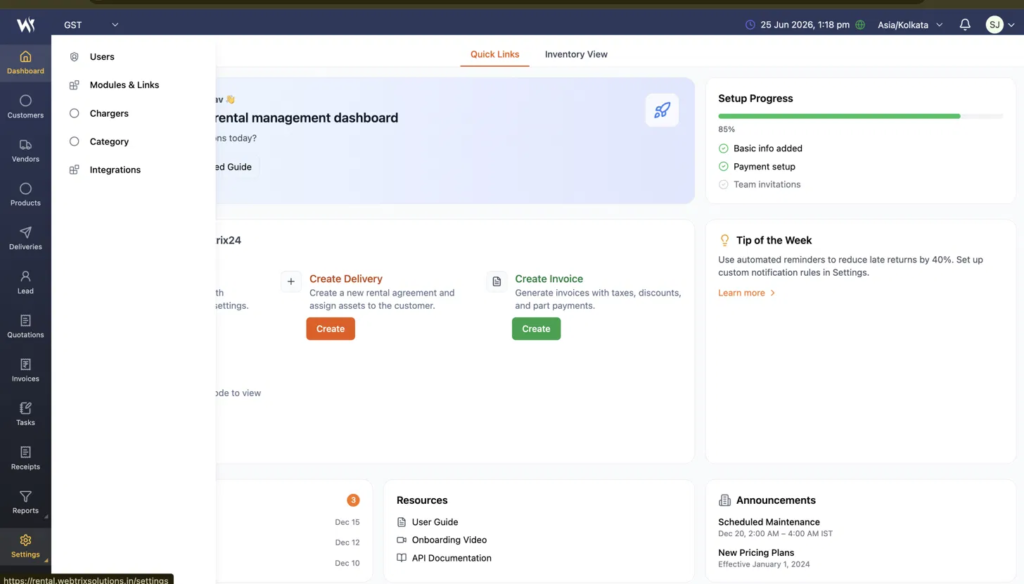
Step 1: Open Settings → Modules & Links
- Log in to the Webtrix24 Rental Application.
- After the Dashboard opens, click Settings from the left sidebar.
- Select Modules & Links.
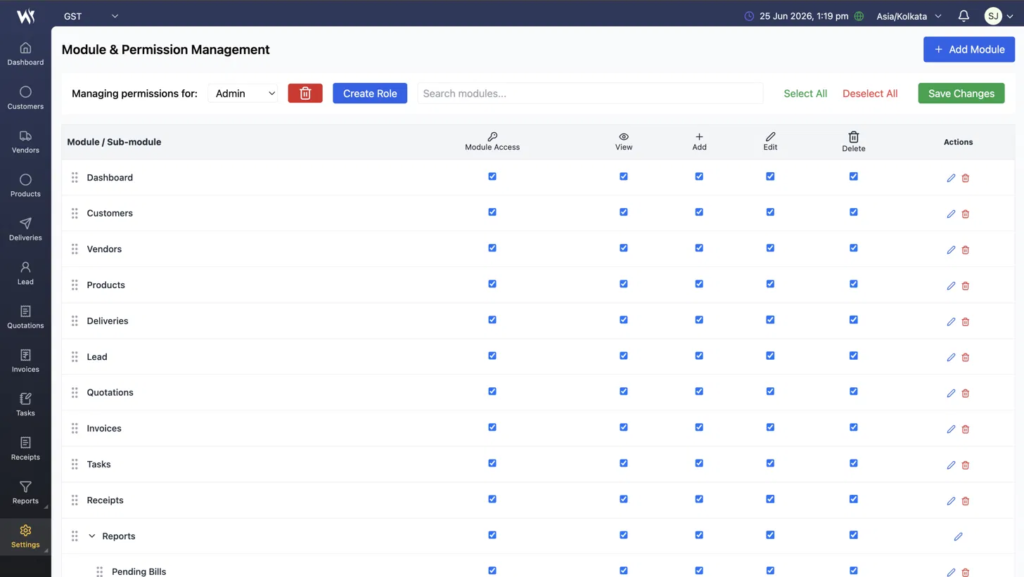
Step 2: Module & Permission Management Page Opens
The Module & Permission Management page will open.
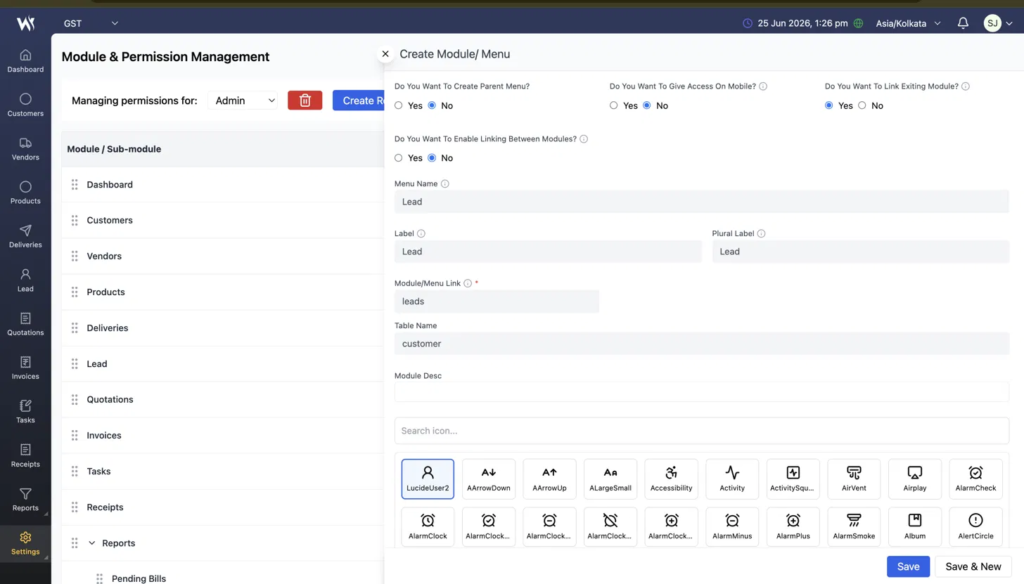
Step 3:Click “+ Add Module”
- Click the + Add Module button located in the top-right corner.
- The Create Module/Menu popup will appear.
- By default, Do You Want To Link Existing Module? is set to No.
- Change this option to Yes.
- Once enabled, additional fields such as Module/Menu Link and Table Name will become available.

Step 4: Add the Lead Module
Enter the following information:
| Field | Value |
|---|---|
| Menu Name | Lead |
| Label | Lead |
| Plural Label | Leads |
| Module/Menu Link | Lead |
| Table Name | customer |
After completing the form:
- Select the desired module icon.
- Click Save.
The Lead module will be added to the module list.
Enable Module Access and the required permissions, then click Save Changes.
The Lead module will now appear in the left navigation panel.
Add the Task Module
Repeat the same process to add the Task module.
Enter the required Task module details in the Create Module/Menu form.
| Field | Value |
|---|---|
| Menu Name | Tasks |
| Label | Task |
| Plural Label | Taks |
| Module/Menu Link | task |
| Table Name | tasks |
After saving:
- Enable Module Access.
- Grant the required permissions.
- Click Save Changes.
The Task module will now be available in the left navigation panel.

Lead Module
Overview
The Lead Module enables users to capture, manage, and convert potential customers into customers. It centralizes lead information and improves follow-up management.
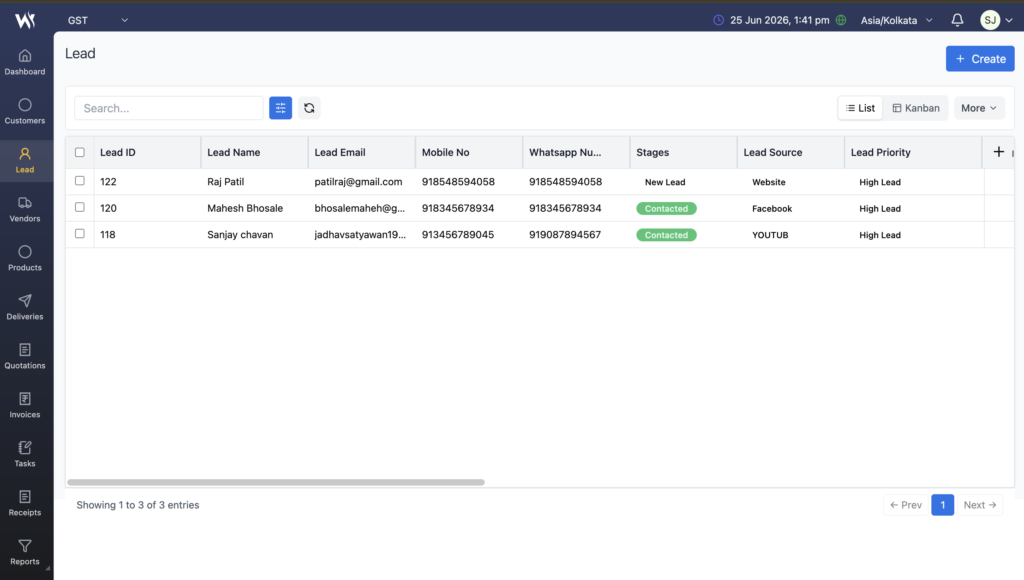
Lead List View
Click Lead in the Left Side Panel to open the Lead List page. It shows all leads with columns like Lead ID, Lead Name, Lead Email, Mobile No, WhatsApp Number, Stages, Lead Source, and Lead Priority.
Lead List View — All leads with key details
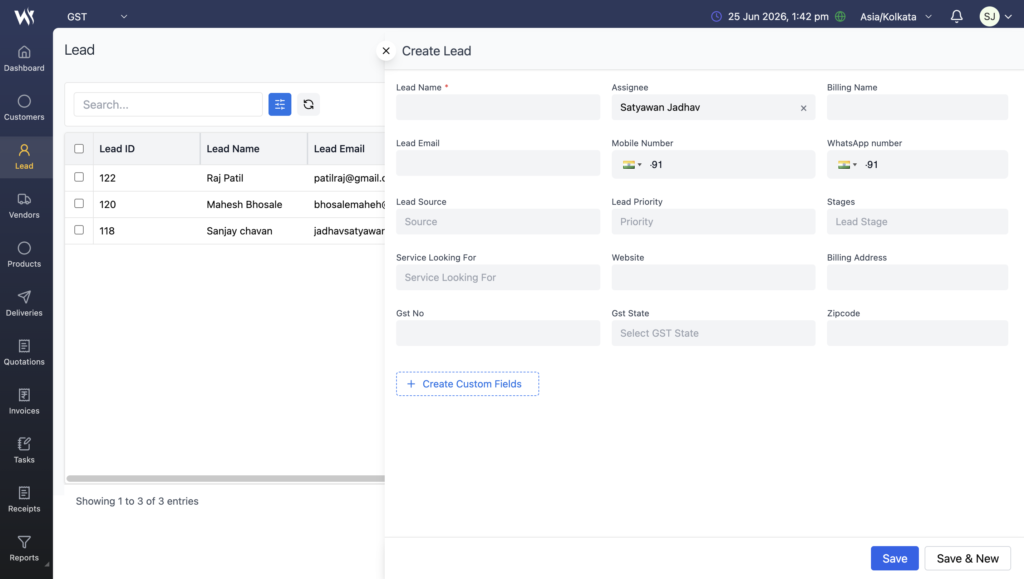
Create a New Lead
Click the + Create button at the top right. The “Create Lead” form opens with fields like Lead Name, Assignee, Billing Name, Lead Email, Mobile Number, WhatsApp Number, Lead Source, Lead Priority, Stages, Service Looking For, Website, Billing Address, GST No., GST State, Zipcode — plus an option to Create Custom Fields. Fill the details and click Save (or Save & New to add another lead right after).
Search, Filter & Refresh
- Search Bar— Type any keyword to quickly search through leads.
- Filters— Click the Filter icon next to Search to build advanced filters and narrow down records (same Advanced Filters system used across the app).
- Refresh Button— Click the refresh icon next to Filters to reload the latest list of leads.
Export Leads — PDF / Excel
Click “More” at the top right to see Export PDF and Export Excel options. If a filter is applied, only the filtered leads are exported — not the full list.
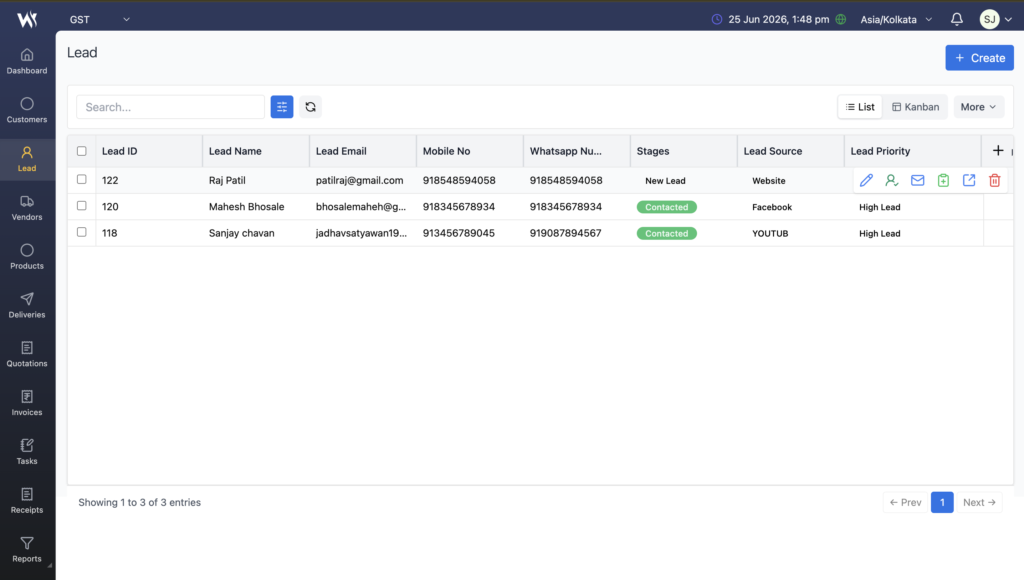
Hover Actions on a Lead Record
Hover over any lead row in the list to reveal quick-action icons:
- Edit (✏️)— Opens the Update Lead form with existing details pre-filled.
- Convert to Customer— Converts the lead into a Customer record.
- Send Email (✉️)— Opens an email compose box to email the lead directly.
- Create Task (📋)— Opens a Create Task form linked to this lead.
- Lead Details (📄)— Opens a right-side detail panel for the lead.
- Delete (🗑)— Removes the lead record.
Hover over a Lead Row — Action icons appear on the right
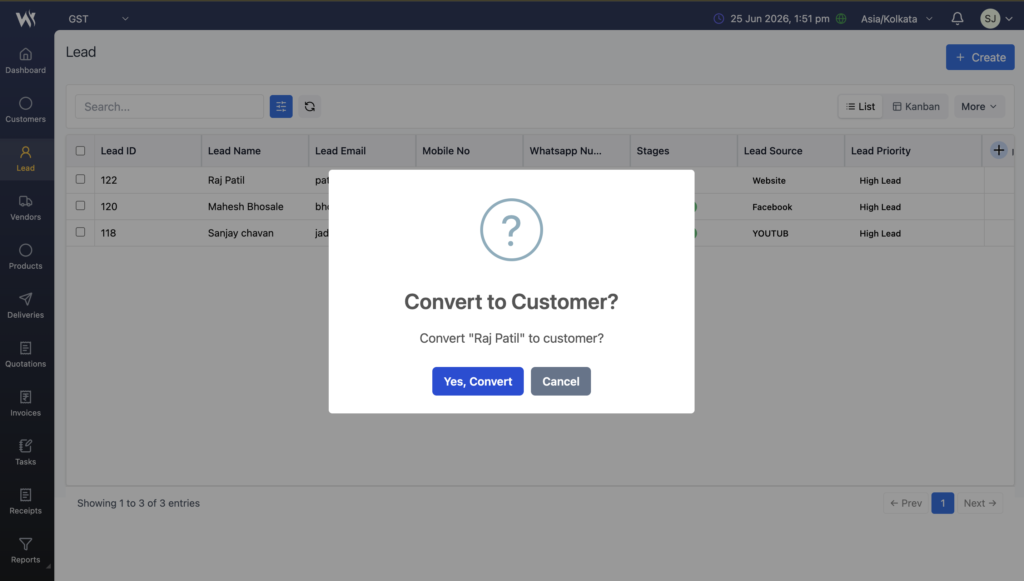
Convert Lead to Customer
Click the Convert to Customer icon on a lead. A confirmation popup appears: “Convert [Lead Name] to customer?”. Click “Yes, Convert” to proceed, or “Cancel” to go back.
Convert to Customer — Confirmation popup
On confirming, a success message appears: “Lead converted to customer successfully”. The record moves out of the Lead module and into the Customer module.
“Lead converted to customer successfully” confirmation
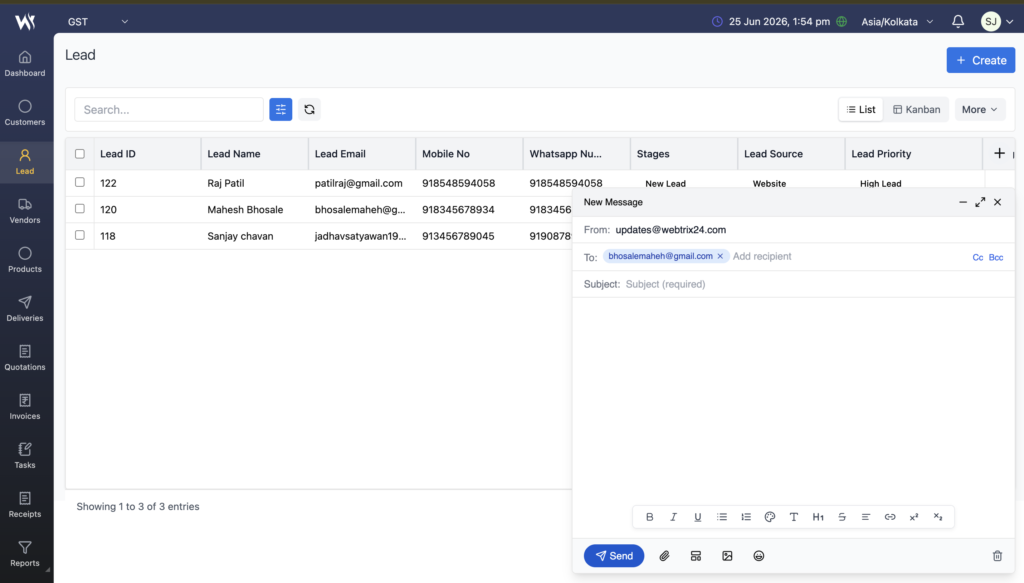
Send Email to a Lead
Click the Send Email icon on a lead row. A “New Message” compose box opens (From, To, Subject, formatted body with bold/italic/lists/links etc.). Write the message and click Send.
Send Email — Compose box with formatting tools
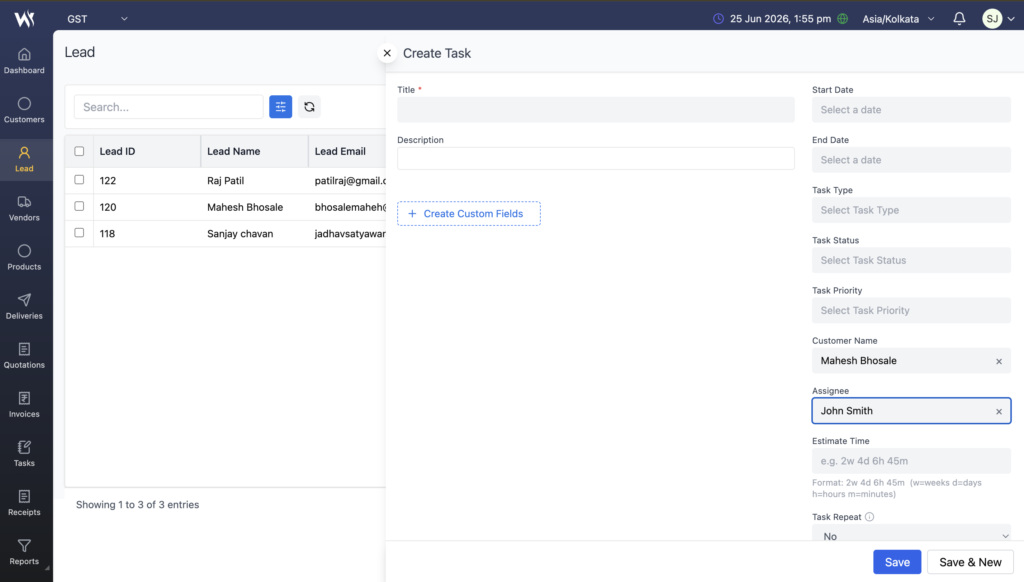
Create a Task from a Lead
Click the Create Task icon on a lead row. The “Create Task” form opens with the Customer Name pre-filled from the lead. Fill Title, Description, Start/End Date, Task Type, Task Status, Task Priority, Assignee, Estimate Time, Task Repeat, then click Save. The task then appears in the Tasks module list view.
Create Task from Lead — Customer Name pre-filled
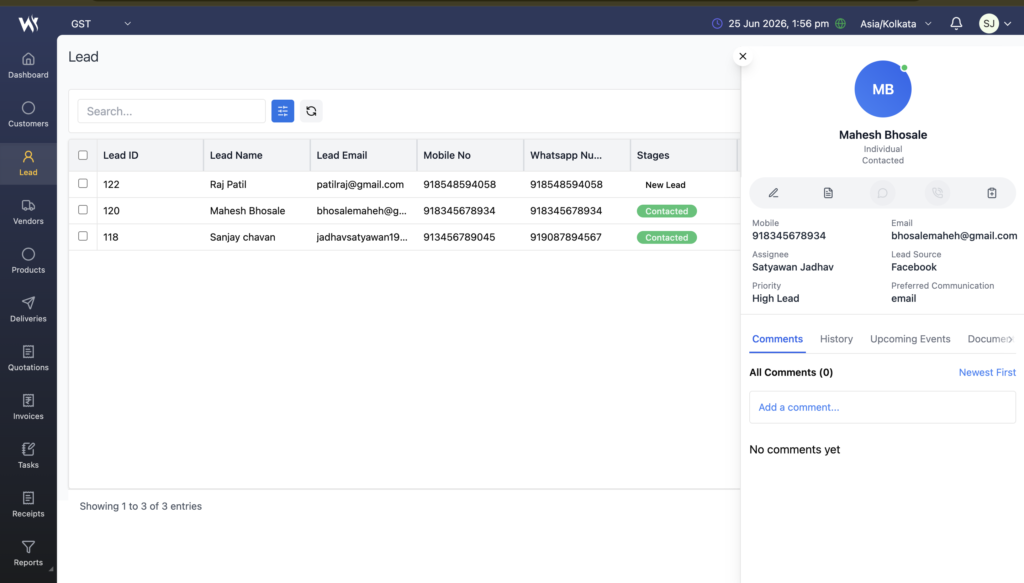
Lead Details — Right Side Panel
Click the Lead Details icon to open a right-side panel showing the lead’s basic info — name, type, stage, Mobile, Email, Assignee, Lead Source, Priority, Preferred Communication. Icons at the top allow Edit, Create Task, Add Notes, Call, and more.
Below that are tabs: Comments, History, Upcoming Events, Documents, Inquiry.
- Comments— Add comments/notes on the lead, sorted Newest First.
- History— Records every action taken on the lead (a full audit trail).
- Documents— Upload documents related to the lead.
- Upcoming Events&Inquiry— Track scheduled follow-ups and inquiries.
Lead Details Panel — Info, action icons, and Comments/History/Documents tabs
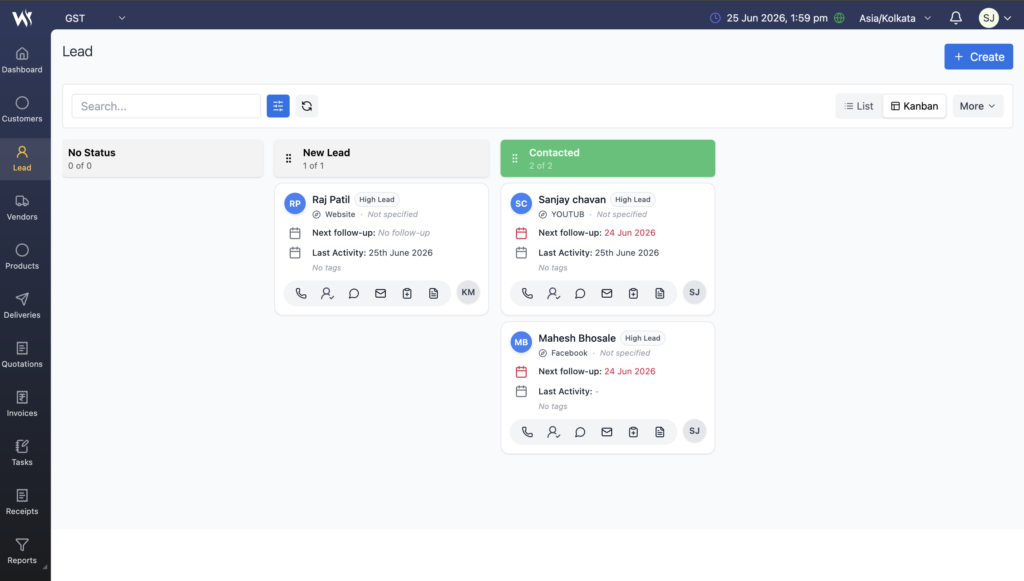
Kanban View
Click Kanban at the top right (next to List) to switch to a board view. Leads are grouped into columns by Stage (e.g. No Status, New Lead, Contacted). Each card shows the lead name, priority tag, source, next follow-up date, last activity, and the same quick-action icons (Call, Convert, Message, Email, Create Task, Notes) — all directly from the card.
Kanban View — Leads grouped by Stage with quick-action icons on each card
How to Use — Quick Summary
- Open Lead Module
Click “Lead” in the Left Side Panel. - Create a Lead
Click “+ Create”, fill the form, and click Save. - Search / Filter / Refresh
Use the Search bar, Filters icon, or Refresh icon to find and update records. - Hover for Quick Actions
Edit, Convert to Customer, Send Email, Create Task, Lead Details, or Delete — directly from the row. - Convert Qualified Leads
Click Convert to Customer → confirm → lead moves to the Customer module. - Switch to Kanban for a Visual View
Click “Kanban” to see leads grouped by stage with the same quick actions on each card. - Export When Needed
Use More → Export PDF / Export Excel to download the (filtered) lead list.
Task Module
Overview
The Tasks module helps you create, assign, and track work items — with Sub Tasks, History, Work Log, Documents, and flexible recurring schedules (Task Repeat).
Features
- Create Task
- Edit Task
- Delete Task
- Search Tasks
- Advanced Filters
- Refresh Data
- Export PDF
- Export Excel
- Comments
- Documents
- History
- Work Log
- Sub Tasks
- Task Repeat
- Custom Repeat
- Email Notifications
- In-App Notifications
- Kanban View
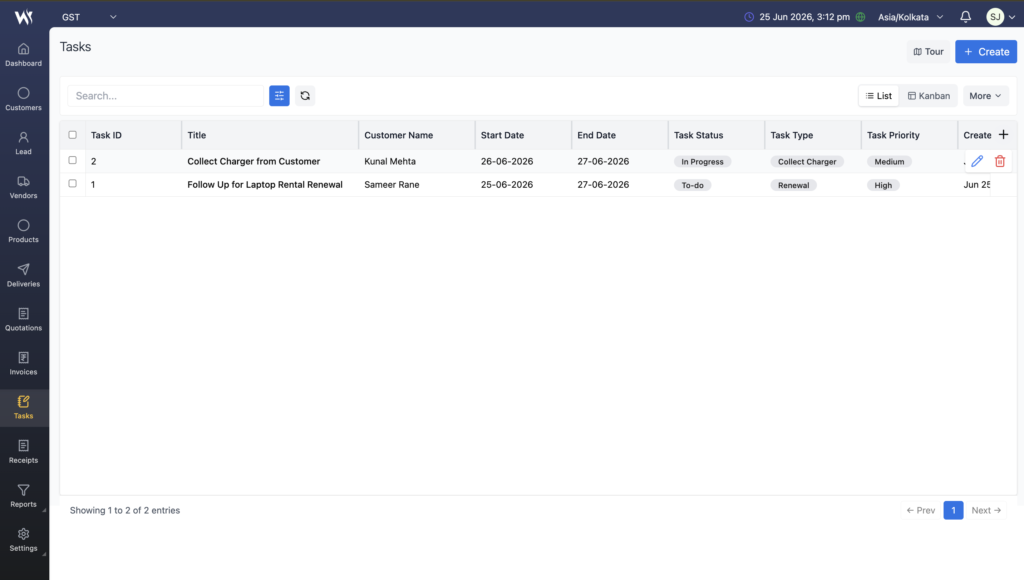
Task List View
Click Tasks in the Left Side Panel to open the Task List page. It shows columns like Task ID, Title, Customer Name, Start Date, End Date, Task Status, Task Type, and Task Priority.
Task List View — All tasks with key details
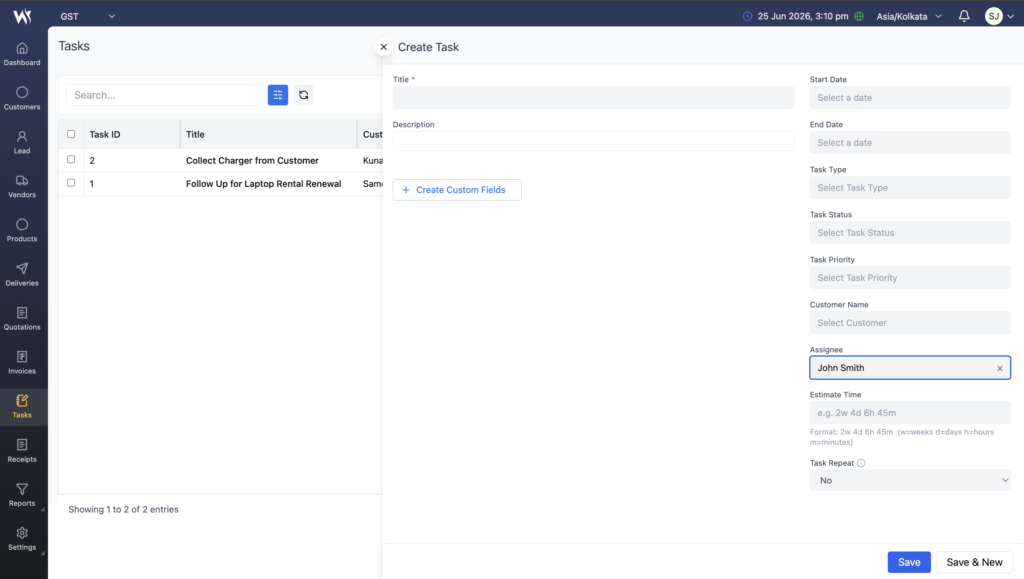
Create a New Task
Click the + Create button at the top right. The “Create Task” form opens with fields: Title, Description, Start Date, End Date, Task Type, Task Status, Task Priority, Customer Name, Assignee, Estimate Time, and Task Repeat — plus Create Custom Fields. Fill the details and click Save (or Save & New).
Create Task Form — Fill details and Save